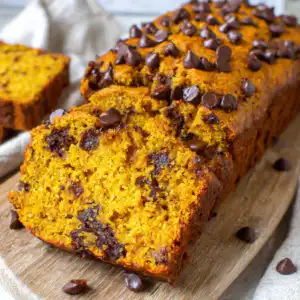
There is nothing quite like the craving for a truly perfect, thick, and chewy bar. My recipe for oatmeal chocolate chip bars delivers on that promise and then some. I found that the secret to transforming a good cookie bar into a truly unforgettable dessert lies in one simple, game-changing step. This recipe is straightforward and no-fail, using the magic of browned butter to create the most flavorful and satisfying bars you have ever made. Get ready to discover your new go-to dessert.
Why You’ll Love This Recipe
The Secret to Unforgettable Flavor: Browned Butter
The magic ingredient here is browned butter. By gently cooking the butter, we toast the milk solids in a process called the Maillard reaction. This creates deep, nutty, and caramel-like notes that regular melted butter simply cannot match. It adds an incredible depth of flavor that perfectly complements the hearty oats and sweet chocolate.
Ultra Chewy and Thick Texture. The browned butter helps create a wonderfully dense and chewy texture that holds together perfectly in a thick bar.
Rich, Gourmet Flavor. The nutty, toffee-like taste from the browned butter elevates these from a simple snack to a truly special dessert recipe. For another healthy and easy snack option, you might like these delicious chia seed pudding recipes.
Incredibly Easy to Make. This one extra step of browning the butter is simple but provides a massive flavor reward, making your bars taste like they came from a high-end bakery.
Perfect for Any Occasion. These bars are always a crowd-pleaser, making them ideal for potlucks, parties, or just an easy weeknight treat. If you enjoy baking, consider trying these cozy apple cider muffins too.
Ingredients Needed

– 1 cup butter ((227g), room temperature)
– 1 cup light brown sugar ((220g), packed)
– 1/2 cup granulated sugar ((100g))
– 2 large eggs
– 2 teaspoons vanilla extract
– 1/2 teaspoon salt
– 1 teaspoon baking soda
– 1 teaspoon baking powder
– 1 1/2 cups all-purpose flour ((188g))
– 2 cups old-fashioned rolled oats ((170g))
– 2 cups chocolate chips ((340g) semi-sweet, milk chocolate, or a little of both!)
Ingredient Notes & Substitutions
Butter: We will be browning the butter first, so start with it whole. I recommend using unsalted butter to have full control over the saltiness of the final bars.
Oats: For the best chewy texture, you must use old-fashioned rolled oats. Quick-cook oats will become mushy, and steel-cut oats will not soften enough. For a gluten-free version, certified gluten-free rolled oats work perfectly.
Chocolate Chips: I love using a mix of semi-sweet chocolate chips and milk chocolate chips. The combination creates a more complex and satisfying chocolate flavor throughout the oatmeal cookie bars.
Baking Soda and Baking Powder: These two leaveners work together. Baking soda helps the bars spread and brown beautifully, while baking powder gives them a gentle lift for a tender texture.

How to Make Oatmeal Chocolate Chip Bars
Step 1: Brown the Butter and Prepare the Pan
First, preheat your oven to 350°F (180°C). Prepare a 9×13 inch pan by lightly greasing it or, for best results, lining it with parchment paper. Leave a little parchment overhang on two sides to create a sling, which makes removing the bars later incredibly easy.
Next, make the browned butter. Place the butter in a light-colored saucepan over medium heat. Let it melt completely, then continue to cook as it foams and sputters. Swirl the pan occasionally. Soon, you will see little golden-brown bits form at the bottom and smell a wonderful, nutty aroma. Immediately remove it from the heat and pour it into your large mixing bowl to cool for about 10 minutes.
Step 2: Mix the Dough
To the bowl with the slightly cooled browned butter, add the light brown sugar and granulated sugar. Using a hand mixer or stand mixer, beat until the mixture is smooth and combined. It will look darker and denser than when using softened butter, which is completely normal.
Add the eggs one at a time, mixing well after each addition. Then, mix in the vanilla extract.
In a separate medium bowl, whisk together the salt, baking soda, baking powder, all-purpose flour, and old-fashioned rolled oats. Add this dry mixture to the wet ingredients and mix on low speed until just combined. Be careful not to overmix. Finally, fold in the chocolate chips with a spatula.
Step 3: Press and Bake
Transfer the dough to your prepared 9×13 inch pan. The dough will be thick and sticky. To press it evenly, I suggest using a greased spatula or slightly damp hands to gently push it into the corners.
Bake for 25 to 30 minutes. You will know the bars are done when the edges are golden brown and just beginning to pull away from the sides of the pan. The center should look set and no longer appear wet or doughy.
Step 4: Cool Completely
This step is critical for perfect bars. You must allow the oatmeal chocolate chip bars to cool completely in the pan before cutting. This takes at least 2 hours. This rest time allows the bars to set up properly, ensuring you get clean, neat squares that do not fall apart.
Mastering Your Bar Texture: Troubleshooting & Tips
Troubleshooting Common Issues
Why are my bars dry or crumbly? This is usually caused by one of two things. First is over-baking; be sure to pull them from the oven as soon as the center is set. Second is measuring flour incorrectly. I recommend the spoon-and-level method: spoon flour into your measuring cup and level it off with a knife, rather than scooping directly from the bag.
Why are my bars greasy? If the browned butter is too hot when you mix it with the sugars, it can cause the fat to separate and lead to a greasy finish. Let it cool for at least 10 minutes before using.
Why won’t my bars hold their shape? This is almost always because they were cut while still warm. The 2-hour cooling period is essential for the bars to firm up and hold their structure.
Baking in Different Pans: Glass vs. Metal
You can certainly bake this recipe in glass bakeware. Glass heats more slowly but retains heat longer, so you may need to add a few extra minutes to the baking time. Keep the oven temperature the same and check for doneness around the 28 to 32-minute mark.
How to Make a Small Batch (9×9 Inch Pan)
For a smaller batch, simply halve all of the ingredients. Bake in a 9×9 inch pan and start checking for doneness a bit earlier, around 20 to 25 minutes.
Pro Tips & Variations
Pro Tips for Perfect Bars Every Time
Don’t Skip the Parchment Sling. It is the easiest way to lift the entire block of bars out of the pan for clean, perfect cutting.
Use Room Temperature Eggs. They incorporate much more smoothly into the batter, creating a more uniform texture.
Don’t Overmix the Flour. For the most tender oatmeal cookie bars, mix the dry ingredients only until the last streaks of flour disappear.
Press Gently and Evenly. A consistent thickness across the pan ensures that every bar bakes evenly, from the edges to the center.
A Sprinkle of Sea Salt. For a final gourmet touch, sprinkle a little flaky sea salt over the top of the bars as soon as they come out of the oven. It enhances the chocolate and caramel flavors beautifully.
Delicious Variations
Nutty Crunch. Fold in 1 cup of toasted and chopped pecans or walnuts along with the chocolate chips for added flavor and texture.
Peanut Butter Swirl. Swap 1 cup of the chocolate chips for peanut butter chips for a classic flavor combination.
Coconut and Chocolate. Add 1 cup of sweetened shredded coconut to the dough for an extra layer of chewiness and tropical flavor.
Seasonal Sprinkles. For parties or holidays, add colorful sprinkles on top of the bars right after they come out of the oven. The heat will help them stick.
Serving & Storage
Serving Ideas
For an extra-decadent dessert, gently warm a cooled bar in the microwave and serve it with a scoop of vanilla ice cream.
These bars are also a perfect potluck or bake sale item. They are sturdy, easy to transport, and simple to serve to a crowd.
Storage and Make-Ahead Instructions
At Room Temperature. Store the cut bars in an airtight container at room temperature. They will stay fresh and chewy for up to 4 days.
Freezing Instructions. These bars freeze wonderfully. For best results, cut them into individual squares, wrap each one tightly in plastic wrap, and then place them in a freezer-safe bag or container. They can be frozen for up to 3 months.
Reheating. To enjoy a bar from the freezer, simply unwrap it and let it thaw at room temperature or microwave it for 15-20 seconds for that fresh-from-the-oven, gooey texture.
This is truly the ultimate recipe for oatmeal chocolate chip bars. The browned butter twist creates a depth of flavor that is simply unmatched, yet the recipe remains wonderfully simple and achievable for bakers of any skill level. I hope you give them a try!
Leave a comment below if you try this recipe – I’d love to know what you think!
FAQ
What is the best way to store Oatmeal Chocolate Chip Bars?
The best way to store them is in an airtight container at room temperature. They will stay fresh for up to 4 days.
Can I freeze Oatmeal Chocolate Chip Bars?
Yes, they freeze perfectly. Wrap individual bars in plastic wrap and store them in a freezer bag for up to 3 months.
Can I bake oatmeal bars in a glass pan, and does it affect baking time?
You can use a glass pan. Since glass heats differently than metal, you may need to add a few extra minutes to the bake time. Keep the oven temperature the same.
How do I adjust the recipe for a smaller (e.g., 9×9 inch) pan?
To make a smaller batch in a 9×9 inch pan, cut all the ingredient quantities in half and reduce the baking time, checking for doneness around 20-25 minutes.
What are some delicious variations for Oatmeal Chocolate Chip Bars?
Some popular variations include adding toasted nuts like pecans or walnuts, swapping some chocolate chips for peanut butter chips, or mixing in shredded coconut.
How do I know when the oatmeal bars are done baking for the perfect chewy texture?
Look for key visual cues. The edges should be a light golden brown and starting to pull away from the pan, and the center should look fully set and not jiggly.

Best Brown Butter Oatmeal Chocolate Chip Bars (Chewy!)
Ingredients
Equipment
Method
- First, preheat your oven to 350°F (180°C). Prepare a 9x13 inch pan by lightly greasing it or, for best results, lining it with parchment paper. Leave a little parchment overhang on two sides to create a sling, which makes removing the bars later incredibly easy.
- Next, make the browned butter. Place the butter in a light-colored saucepan over medium heat. Let it melt completely, then continue to cook as it foams and sputters. Swirl the pan occasionally. Soon, you will see little golden-brown bits form at the bottom and smell a wonderful, nutty aroma. Immediately remove it from the heat and pour it into your large mixing bowl to cool for about 10 minutes.
- To the bowl with the slightly cooled browned butter, add the light brown sugar and granulated sugar. Using a hand mixer or stand mixer, beat until the mixture is smooth and combined. It will look darker and denser than when using softened butter, which is completely normal.
- Add the eggs one at a time, mixing well after each addition. Then, mix in the vanilla extract.
- In a separate medium bowl, whisk together the salt, baking soda, baking powder, all-purpose flour, and old-fashioned rolled oats. Add this dry mixture to the wet ingredients and mix on low speed until just combined. Be careful not to overmix. Finally, fold in the chocolate chips with a spatula.
- Transfer the dough to your prepared 9x13 inch pan. The dough will be thick and sticky. To press it evenly, I suggest using a greased spatula or slightly damp hands to gently push it into the corners.
- Bake for 25 to 30 minutes. You will know the bars are done when the edges are golden brown and just beginning to pull away from the sides of the pan. The center should look set and no longer appear wet or doughy.
- This step is critical for perfect bars. You must allow the oatmeal chocolate chip bars to cool completely in the pan before cutting. This takes at least 2 hours. This rest time allows the bars to set up properly, ensuring you get clean, neat squares that do not fall apart.